24 Hour Emergency Plumbing Services Near Me – Fast Help When You Need It Most
February 11, 2026
Licensed Electrician for Home Wiring Upgrade: Ensuring Safety and Efficiency
February 11, 2026
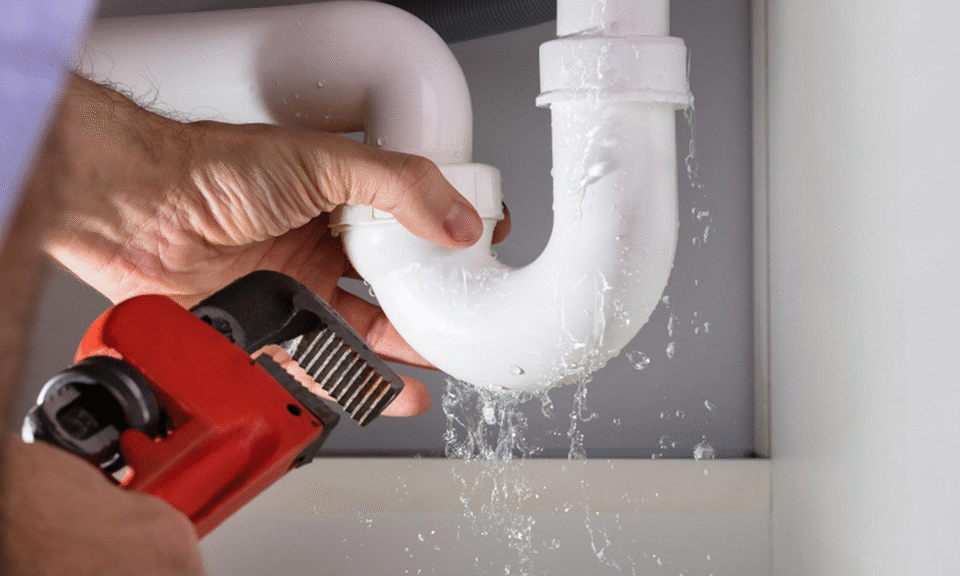
A leaking pipe under your sink can be a frustrating problem. Not only can it damage your cabinets and flooring, but it can also lead to mold growth if left untreated. The good news is that most leaks under the sink are relatively simple to fix with some basic tools and a little patience. In this article, we’ll walk you through how to identify, troubleshoot, and repair a leaking pipe under your sink safely and effectively.
Signs of a Leaking Pipe Under the Sink
Before attempting a repair, it’s important to confirm that the leak is coming from the pipe under your sink. Common signs include:
- Dripping water beneath the sink cabinet.
- Water stains on the cabinet floor or walls.
- Musty odors caused by moisture buildup.
- Pooling water around the base of the sink.
Once you notice these signs, it’s crucial to act quickly. Ignoring a leak can cause serious water damage and costly repairs.
Tools and Materials You’ll Need
Before you start fixing the leak, gather the necessary tools and materials. This ensures that you don’t waste time searching for items midway through the repair. Commonly needed tools include:
- Adjustable wrench
- Bucket or container (to catch water)
- Plumber’s tape (Teflon tape)
- Pipe wrench (if needed)
- Replacement washers or seals
- Towels or rags
If the leak is caused by a damaged pipe, you may need a replacement pipe or fittings, usually available at hardware stores. Having everything ready makes the process much smoother.
Step-by-Step Guide to Fixing a Leaking Pipe Under the Sink
Step 1: Turn Off the Water Supply
The first step is to turn off the water supply to the sink. Look for the shutoff valves under the sink, usually located on the pipes leading to the faucet. Turn both the hot and cold water valves clockwise until fully closed. If your sink doesn’t have individual shutoff valves, you’ll need to turn off the main water supply for your home.
After shutting off the water, open the faucet to drain any remaining water in the pipes. This prevents water from spilling when you remove the pipe.
Step 2: Place a Bucket Under the Leak
Leaks can be messy, so place a bucket or container directly under the pipe to catch water. You may also want to use a towel to absorb small drips. This helps keep your cabinet clean and prevents further water damage.
Step 3: Inspect the Pipe
Take a close look at the pipe to determine where the leak is coming from. Common leak locations include:
- Pipe joints: The connection points between two pipes may be loose.
- Washers and seals: Rubber washers can wear out over time.
- The pipe itself: Cracks or corrosion can cause leaks.
Identifying the exact source of the leak will help you decide the right fix.
Step 4: Tighten Loose Connections
If the leak is coming from a joint, it may just be loose. Use an adjustable wrench to tighten the nuts connecting the pipes. Be careful not to overtighten, as this can crack the pipes or damage the fittings.
After tightening, turn on the water slightly to check if the leak has stopped. If it continues, the problem may be a worn-out washer or a damaged pipe.
Step 5: Replace Worn-Out Washers or Seals
Many leaks under the sink are caused by old rubber washers or seals. To replace them:
- Loosen the nuts holding the joint where the leak is occurring.
- Remove the old washer or seal carefully.
- Install a new washer or seal in the same position.
- Re-tighten the joint and test for leaks.
Using plumber’s tape on threaded connections can also help create a tighter seal. Wrap the tape around the threads in a clockwise direction before reconnecting the pipes.
Step 6: Replace Damaged Pipes if Necessary
If the pipe itself is cracked, corroded, or damaged, you’ll need to replace it:
- Remove the damaged section of the pipe by loosening the connecting nuts.
- Measure and cut a replacement pipe if necessary.
- Install the new pipe with washers and plumber’s tape as needed.
- Tighten all connections and test for leaks.
PVC pipes are commonly used under sinks and are easy to replace with basic tools.
Step 7: Test the Repair
Once you’ve made the repair, turn the water supply back on slowly. Watch the repaired area carefully for any signs of leakage. Let the water run for a few minutes to ensure that the fix is holding.
If the leak persists, double-check the connections, washers, and seals. Sometimes, minor adjustments or replacing multiple washers may be needed.
Step 8: Clean Up and Prevent Future Leaks
After confirming the repair, clean up any water that may have spilled. Dry the area thoroughly to prevent mold growth. Consider placing a waterproof mat under the sink to protect the cabinet from future leaks.
Regularly checking under your sink for small drips or stains can help catch leaks early, saving time and money in the long run.
Tips to Avoid Future Leaks
- Avoid over-tightening pipe connections. This can damage threads and cause leaks.
- Check seals regularly. Rubber washers degrade over time and should be replaced every few years.
- Don’t pour grease or heavy debris down the sink, as this can lead to clogs and increased pressure on pipes.
- Install a water leak detector under the sink for early warning of leaks.
5 FAQs About Fixing a Leaking Pipe Under Sink
1. Can I fix a leaking pipe without turning off the water?
No. Always turn off the water supply before attempting any repair. Trying to fix a leak with the water on can cause flooding and make the problem worse.
2. How do I know if I need a new pipe or just a washer?
Inspect the pipe carefully. If the pipe is cracked, corroded, or visibly damaged, it will need replacement. If the pipe looks intact but the leak is at a joint, replacing the washer or tightening the connection usually solves the problem.
3. What tools do I need to fix a leaking pipe under the sink?
You’ll need an adjustable wrench, plumber’s tape, replacement washers or seals, a bucket to catch water, and towels to clean up drips. A pipe wrench may be needed for stubborn nuts.
4. How long does it take to fix a leaking pipe under the sink?
Minor leaks can usually be fixed in 30–60 minutes. If you need to replace a pipe, it may take 1–2 hours depending on your experience.
5. When should I call a plumber?
Call a plumber if the leak persists after replacing washers, if the pipe is severely damaged, or if you are uncomfortable performing the repair yourself. Professional help ensures the leak is fixed properly and prevents water damage.
Fixing a leaking pipe under the sink is a task many homeowners can handle themselves. With the right tools, patience, and careful inspection, you can stop the leak and protect your home from water damage. Remember, the key is to act quickly and follow each step carefully. With proper maintenance, your plumbing should remain leak-free for years to come.